Watch our Winter Sowing Workshop
Full Transcript:
Welcome everyone. I’m Danielle, the Stewardship and Outreach coordinator at West Creek Conservancy.
Today we’re diving into one of the easiest, most rewarding ways to grow native plants at home: winter sowing. So whether you’ve gardened for years or are just getting started, winter sowing is a great way to connect to the land, support wildlife, and bring more native beauty into your yard.
I’d also like to take a moment to express our gratitude to the Ohio EPA and to Cox Charities for their generous grant support. Their funding makes our seed library program possible and helps us offer educational workshops like this one, which empower our community to grow native plants and care for our local environment. We are so grateful for that support and we’re happy that you’re here today.
Before we dive in, let me share a little about West Creek Conservancy. We’re a nonprofit dedicated to protecting land, restoring habitat, and connecting people to nature. One of our key initiatives is Creekside Collaborative Partners in Parma, a community hub focused on restoring biodiversity and encouraging people to rediscover the natural world in their own backyards. This winter sowing workshop is part of that effort. Everything we do is guided by our mission to care for the places that care for us, and workshops like this empower our communities to take part in that mission.
Here’s what we’ll cover today: why native plants matter, why shrinking your lawn is one of the easiest climate-positive actions you can take, how seed stratification works, winter sowing basics, and then we’ll get hands-on so you can make your own winter sowing jugs. By the end, you’ll feel totally confident to do this at home and maybe even inspire your neighbors to join you.
So, let’s start with the foundation. What exactly is a native plant? Native plants are species that have evolved here over thousands of years. That long history means they’re finely tuned to our soils, our climate, and the wildlife that depends on them. They form the base of our ecosystems. Everything from insects to birds to mammals rely on them for food and habitat.
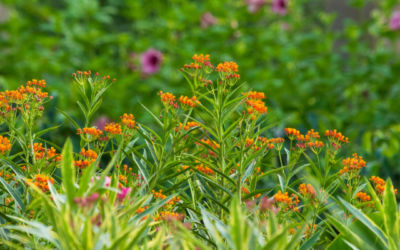
Some examples of native plants that grow around us include purple coneflower, wild bergamot or bee balm, milkweed, black-eyed Susan, Joe-Pye weed, and trees like oaks and elms, and so many more.
Native plants support wildlife in ways that non-native ornamentals simply can’t. Many insects can only eat specific native plants, and those insects are essential pollinators for our food systems and also provide food for birds, frogs, bats, and more. Native plants also improve soil health with deep root systems that help water soak in, reduce erosion, and keep our waterways clean. When we plant natives, we’re supporting life at every level.
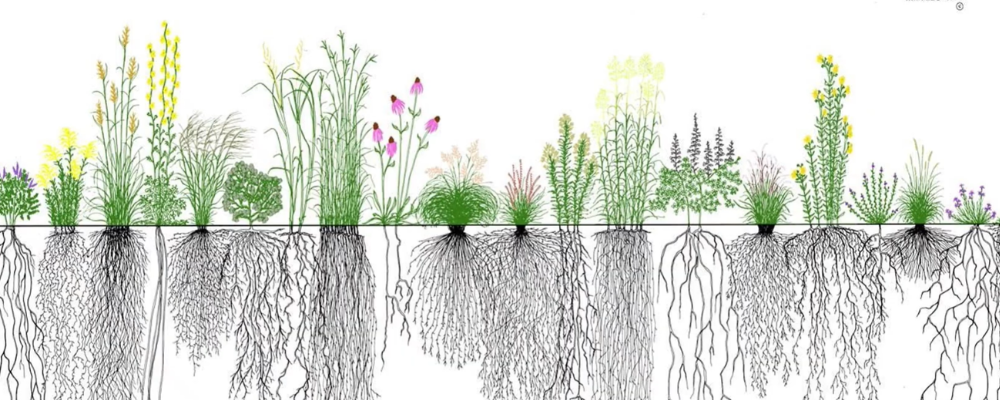
Now, let’s compare that with turf grass. Turf grass offers very little food or shelter for wildlife. It’s high maintenance, requiring mowing, fertilizer, and watering. It also leads to compacted soil, poor water infiltration, and increased runoff. All of that contributes to water pollution and flooding. Shrinking our lawns even a little makes a big difference.
This image highlights the contrast between a turf-heavy landscape and a biodiverse one. Look to the far left to see the small roots of turf grass compared to the deep roots of natives. Think about how much more life a yard can support when even a small portion is planted with natives.
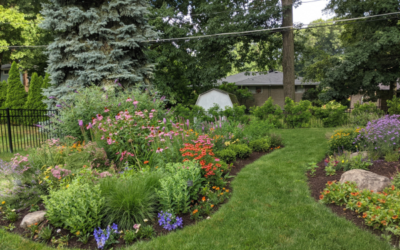
So, if lawns don’t do much ecologically, what happens if we start shrinking them, even a little? You don’t need to eliminate your lawn—just rethink how much you actually need. When homeowners shrink lawns, even by a few feet across a whole neighborhood, it adds up. Suddenly, we get wildlife corridors, pollinator pathways, healthier soil, and cleaner water entering our watershed.
Good places to start shrinking your lawn include edges of your yard, under trees, along fences, slopes, driveways, or anywhere that’s annoying to mow to make it easier for you.
And the easiest way to turn lawn into habitat doesn’t require any digging at all. We’re talking about smothering your grass using cardboard and mulch. This technique blocks light, killing the turf. It smothers the grass so that your soil stays intact. This costs little and requires minimal effort, and it sets the stage for planting your new native garden.
Here’s the step-by-step process. Choose your area of lawn you want to shrink, starting small so that you don’t get overwhelmed. Mow the grass low. Lay down your cardboard, making sure to remove any tape or staples, and overlap the edges so that no grass can peek through. Add three to four inches of mulch. Leaf mulch or wood chips work great here. Let it rest for a few weeks to a few months. Then the cardboard will have broken down and you can dig right into the soil for planting.
If you want to plant in the spring, start this process in the fall. And if you’re planning for fall planting, prep the area in late spring or summer.
So, how do native plants fit into this, especially when starting from seed?
Well, let’s talk about seeds, specifically stratification.
Most native seeds need cold weather before they can sprout. It’s how they evolved. Winter tells them when it’s safe to grow in the spring. Stratification simply means giving seeds a period of cold, moist conditions. Some seeds need 30 days, some need 60 to 90. Some need light, others need total darkness, but all of them rely on seasonal cues.
And this is exactly what happens in nature. Seeds fall in autumn, get covered with leaves, snow, and frost, then go through the freeze-thaw cycle. By spring, the seeds are ready to germinate.
Winter sowing mimics this perfectly, but in a controlled mini greenhouse.
Winter sowing means planting seeds into containers like milk jugs that act as mini greenhouses. You’ll leave them outside all winter and let nature handle the timing and even the watering. It’s perfect for native plants because it gives them the cold, moist stratification that they need. The seedlings are sturdy, hardy, and ready for real life.
So, is winter sowing better than sowing seeds directly in the ground? Sometimes it is. It protects seeds from being eaten or washed away, giving you higher germination success and ensuring great early root development.
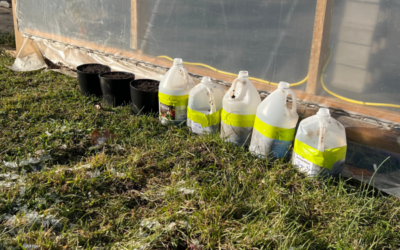
First, let’s go over the supplies you need handy for winter sowing. A cleaned-out milk jug for each species that you want to winter sow. Any clear or translucent container works here, as long as you can put holes in the top and the bottom. A milk jug is nice because there is already an opening at the top.
Some other examples include vinegar jugs, distilled water jugs, or even clear salad containers. For your soil, a general potting mix works perfectly. If you like, you can mix in a bit of compost, but it’s not required. You do want your soil to be moist, but not soaking wet.
And today we’re focusing on native seeds that need cold stratification, but this method will also work for other perennials, cold-hardy annuals, or cool-season vegetables. You’ll also need scissors or a razor blade, tape—I recommend duct tape or packing tape—and a marker for labeling your jugs.
Winter sowing works because many native seeds need 30 to 90 days of cold moist stratification. In Ohio, we usually stop getting reliable cold after mid-March. So the best winter sowing window is late December through late February.
Cool-season natives can be sown earlier since they benefit from a longer cold period. Warm-season prairie species like coneflower, milkweed, and blazing star typically need 30 to 60 days, so sowing them any time through February works well. If you sow too late, there may not be enough cold days left. A good rule is to look at mid-March as the cutoff and count backwards based on your seed stratification needs. If they get more than what’s listed, don’t worry, because that’s completely okay.
So here are the steps.
Cut a milk jug in half, leaving one side intact to act as a hinge. Puncture a few drainage holes at the bottom. Add soil to at least a few inches deep. Sprinkle in your seeds and add some soil on top so that they are at the proper depth.
For most native seeds this will be about a quarter to an eighth of an inch, but some seeds don’t need any soil covering, so make sure to check the species that you are planting.
Tape your jug shut. Label your jug with what you planted and the date. Then place the jug outdoors and let nature handle the rest.
Once spring arrives, you’ll see tiny green seedlings appear like magic, and then it is time for transplanting.
Some things to keep in mind: not every seed will sprout, and that is okay. Even partial success helps your local ecosystem. Native plants support life at every stage, even as seeds and sprouts. So remember, curiosity and patience are your best tools. You don’t need to be an expert. You’re learning alongside nature.
This year, I encourage you to take at least one of these actions. Shrink just one section of your lawn. Talk to your neighbors about how easy and beautiful native gardening can be. Check out our resources at West Creek Conservancy and Creekside Collaborative. And if you share your progress on social media, tag us. We love seeing your projects grow.
And now it’s time for the fun part. Let’s make your winter sowing jugs. I’ll walk you through each step and we’ll do it together.
All right. So up to this point we have talked about why to use native plants, how you can easily shrink your lawn, what winter sowing is, and why it works. So now we’re going to take all that and put it into action and do some winter sowing with our seeds.
Before we begin, I’m just going to review the supplies I have here one more time. I’ve got our milk jug, our soil here. Today we’re using a soil that actually came from some compost, so it is pretty high in nutrients, but your seeds are going to have all the nutrients that they need to sprout. So if you just want to use a basic potting mix, that’s totally fine as well.
We’ve got our seeds. Today we’re doing swamp milkweed. And then I’ve got my razor blade, my tape, and my marker.
So first step is we are going to cut the milk jug in half, leaving one side intact so we have a hinge. And I’m going to remove the cap because we’re not going to need that anymore.
All right. So we’ve got a nice hinge here so we can access the inside of our milk jug.
Next we are going to add some drainage holes into the bottom so that the soil doesn’t get waterlogged. And I’m also going to add some holes at the top to make sure that everything gets watered really nicely outside.
So I went ahead and added four holes at the top and four holes at the bottom there.
And so now we’re going to add our soil. Remember we are using soil that is already moist here. Think of a damp sponge. You don’t want it to be dripping wet, but you do want it to have some moisture because that’s what our seeds are going to need.
You want your soil to be at least a couple inches deep, but you can also fill it all the way to where you cut if you want to.
We do want it to be a little bit compressed, so I’m just going to tap a little bit and lightly press. We don’t want it to be so compact that the roots can’t get through it, but we do want to compact it gently.
All right. And now it’s time for the fun part. We’re going to plant our seeds.
We’ve got swamp milkweed here. These ones need 30 days of cold stratification. Again, just make sure to check your species that you’re planting to know how long they need in there. And remember that mid-March is about when our weather is going to get warmer, so count backwards to make sure your seeds are going to have enough cold stratification.
I’m just going to take these seeds and sprinkle them in the soil here.
You want them to have a little bit of space, but you could definitely put a lot more seeds in here than this.
These do need a little bit of covering, so I’m going to gently add a light covering about an eighth of an inch. Again, make sure to check your packet because your seeds might not need any covering. I’m just going to gently compact that again. At this point I’m also going to add a little bit more moisture for these seeds.
All right.
Now we can close up the jug. I do recommend using duct tape for this because it’s going to be the most weather-resistant, but I’m going to be using masking tape here. It doesn’t need to be perfect. You’re making a little greenhouse, so it just needs to be secure enough that it doesn’t fly open.
All right. So our jug is taped up. I’m going to go ahead and label this with the species that I planted and the date.
The UV from the sun can make this Sharpie fade, so you can also put a label on the inside or underneath your jug to try to prevent that UV from fading the marker.
So there is our labeled jug.
I do recommend labeling all of your jugs because once they come up in the spring, you will not be able to tell what seedlings are what anymore.
The next step is to put this outside. We are going to put this in a spot that is under the weather so it’s getting rain and snow, but ideally surrounded in some way so the wind doesn’t knock it over. That can be against a wall, or you can put some rocks around it to keep it secure.
Throughout the winter and once we’re getting into spring, as it gets warmer, it can get really hot in here and things might start drying out. So make sure to keep an eye on it in case you need to add moisture.
Once it gets even warmer, you don’t want it to get so hot in here that your seedlings are struggling. You can always open it up on really hot days in the spring.
Once your seedlings have sprouted and spring temperatures are consistently warm, you can go ahead and open it up and gently transplant those into your garden.
So that’s it. Winter sowing is simple, affordable, and incredibly effective.
I’d like to express our gratitude one more time to the Ohio EPA and Cox Charities for their grant support for making this program possible. Please share your progress on social media and tag us because we would love to see your winter sowing projects.
More Articles for a Healthy Yard and Home

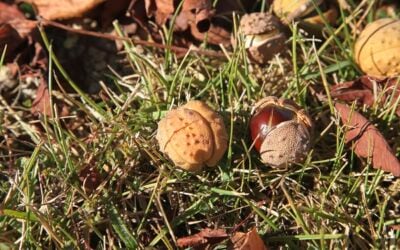
How to Plant Stratified Acorns
Why You Should Avoid Potting in Nursing Pots Planting from seed takes a little patience up front, but a tree planted from seed will quickly outgrow...
How To Fight Stream Pollution Through Effective Stormwater Management
In this guide, we’ll explore and address how pollutant loading in streams is crucial for the well-being of both watersheds and communities.

Roots of Sustainability: Understanding the Importance of Trees in Urban Living
A healthy urban tree canopy has a profound and positive impact on community quality of life in various ways. Recognizing the value of urban trees and investing in their preservation can contribute to sustainable, resilient, and vibrant urban living.
Shrink Your Lawn: A Guide to Growing More Native Plants
In this guide, we’ll explore the importance of reducing your lawn’s size and explain the many benefits it brings, both for your wallet and the environment.
Cold-Weather Cultivation: 8 Steps to Winter Sowing and Seed Stratification
It is important to determine when native seedlings are ready for harvest. Not sure how to? Check out our guide to harvesting native seedlings.
How to Know When Native Seedlings are Ready to be Harvested
It is important to determine when native seedlings are ready for harvest. Not sure how to? Check out our guide to harvesting native seedlings.
Harvesting Guide for Native Seedlings and Plants
Creekside Collaborative is always in need of native trees and seedlings. To get your native plants to the nursery, follow this harvesting guide.

How to Add Native Plants to Your Garden
Many of us have chosen to cultivate species and landscapes that are not naturally-occurring in our region. It’s wasteful, expensive and detrimental to wildlife who encounter reduced availability of the native species upon which they feed.
Wildlife-Friendly Fall Yard Cleanup
Before any landscape program begins, assess the current conditions of your home landscape. This assessment will help you to identify and prioritize future projects and allow you to appreciate all the positive changes you’ve made.
Composting 101
Before any landscape program begins, assess the current conditions of your home landscape. This assessment will help you to identify and prioritize future projects and allow you to appreciate all the positive changes you’ve made.